Normally I like to keep the blog more about music and relegate my gear stuff to my “Things I Make” page, but this one’s something special!
This is my “Woodchipper” amp design. It’s nothing revolutionary, basically a tweed-era champ with some modern refinements, like better power filtering, a mids boost/modified presence control on the second preamp stage, and switchable negative feedback that adds a surprising amount of versatility.
This is a build report for the amp itself. If possible, I’ll create a build document if you’d like to make one for yourself (or modify an existing champ build), excluding plans for the cabinet, of course, because that was all my dad.

A friend from the forums (Morgan) hooked me up with a drilled piece of eyelet board in a trade, and loaned me his staking anvil and provided the turrets.

I populated it and worked on it a little bit at a time over the following week or so, until I had the chassis wired.

Took Merlin Blencowe’s (The Valve Wizard) advice on keeping the heaters away from the side of the tube sockets, and coming up over the top

Took a close-up of the pots and feedback switch and realized after I did so that the wiper lug of the mids pot was backwards, so I fixed that right after. Comparatively minor mistake to having that leftmost cap backwards (yeah, I did that) or forgetting to connect the leftmost red wire (B+ power connection) (yeah, I did that one, too!).

Close-up of the circuit board. Not the absolute neatest work possible, but I did my best, and it was my first time working with turret board after all.

Here’s the finished chassis from the front …

… and the back (yup, I tortured myself with a detachable power chord).
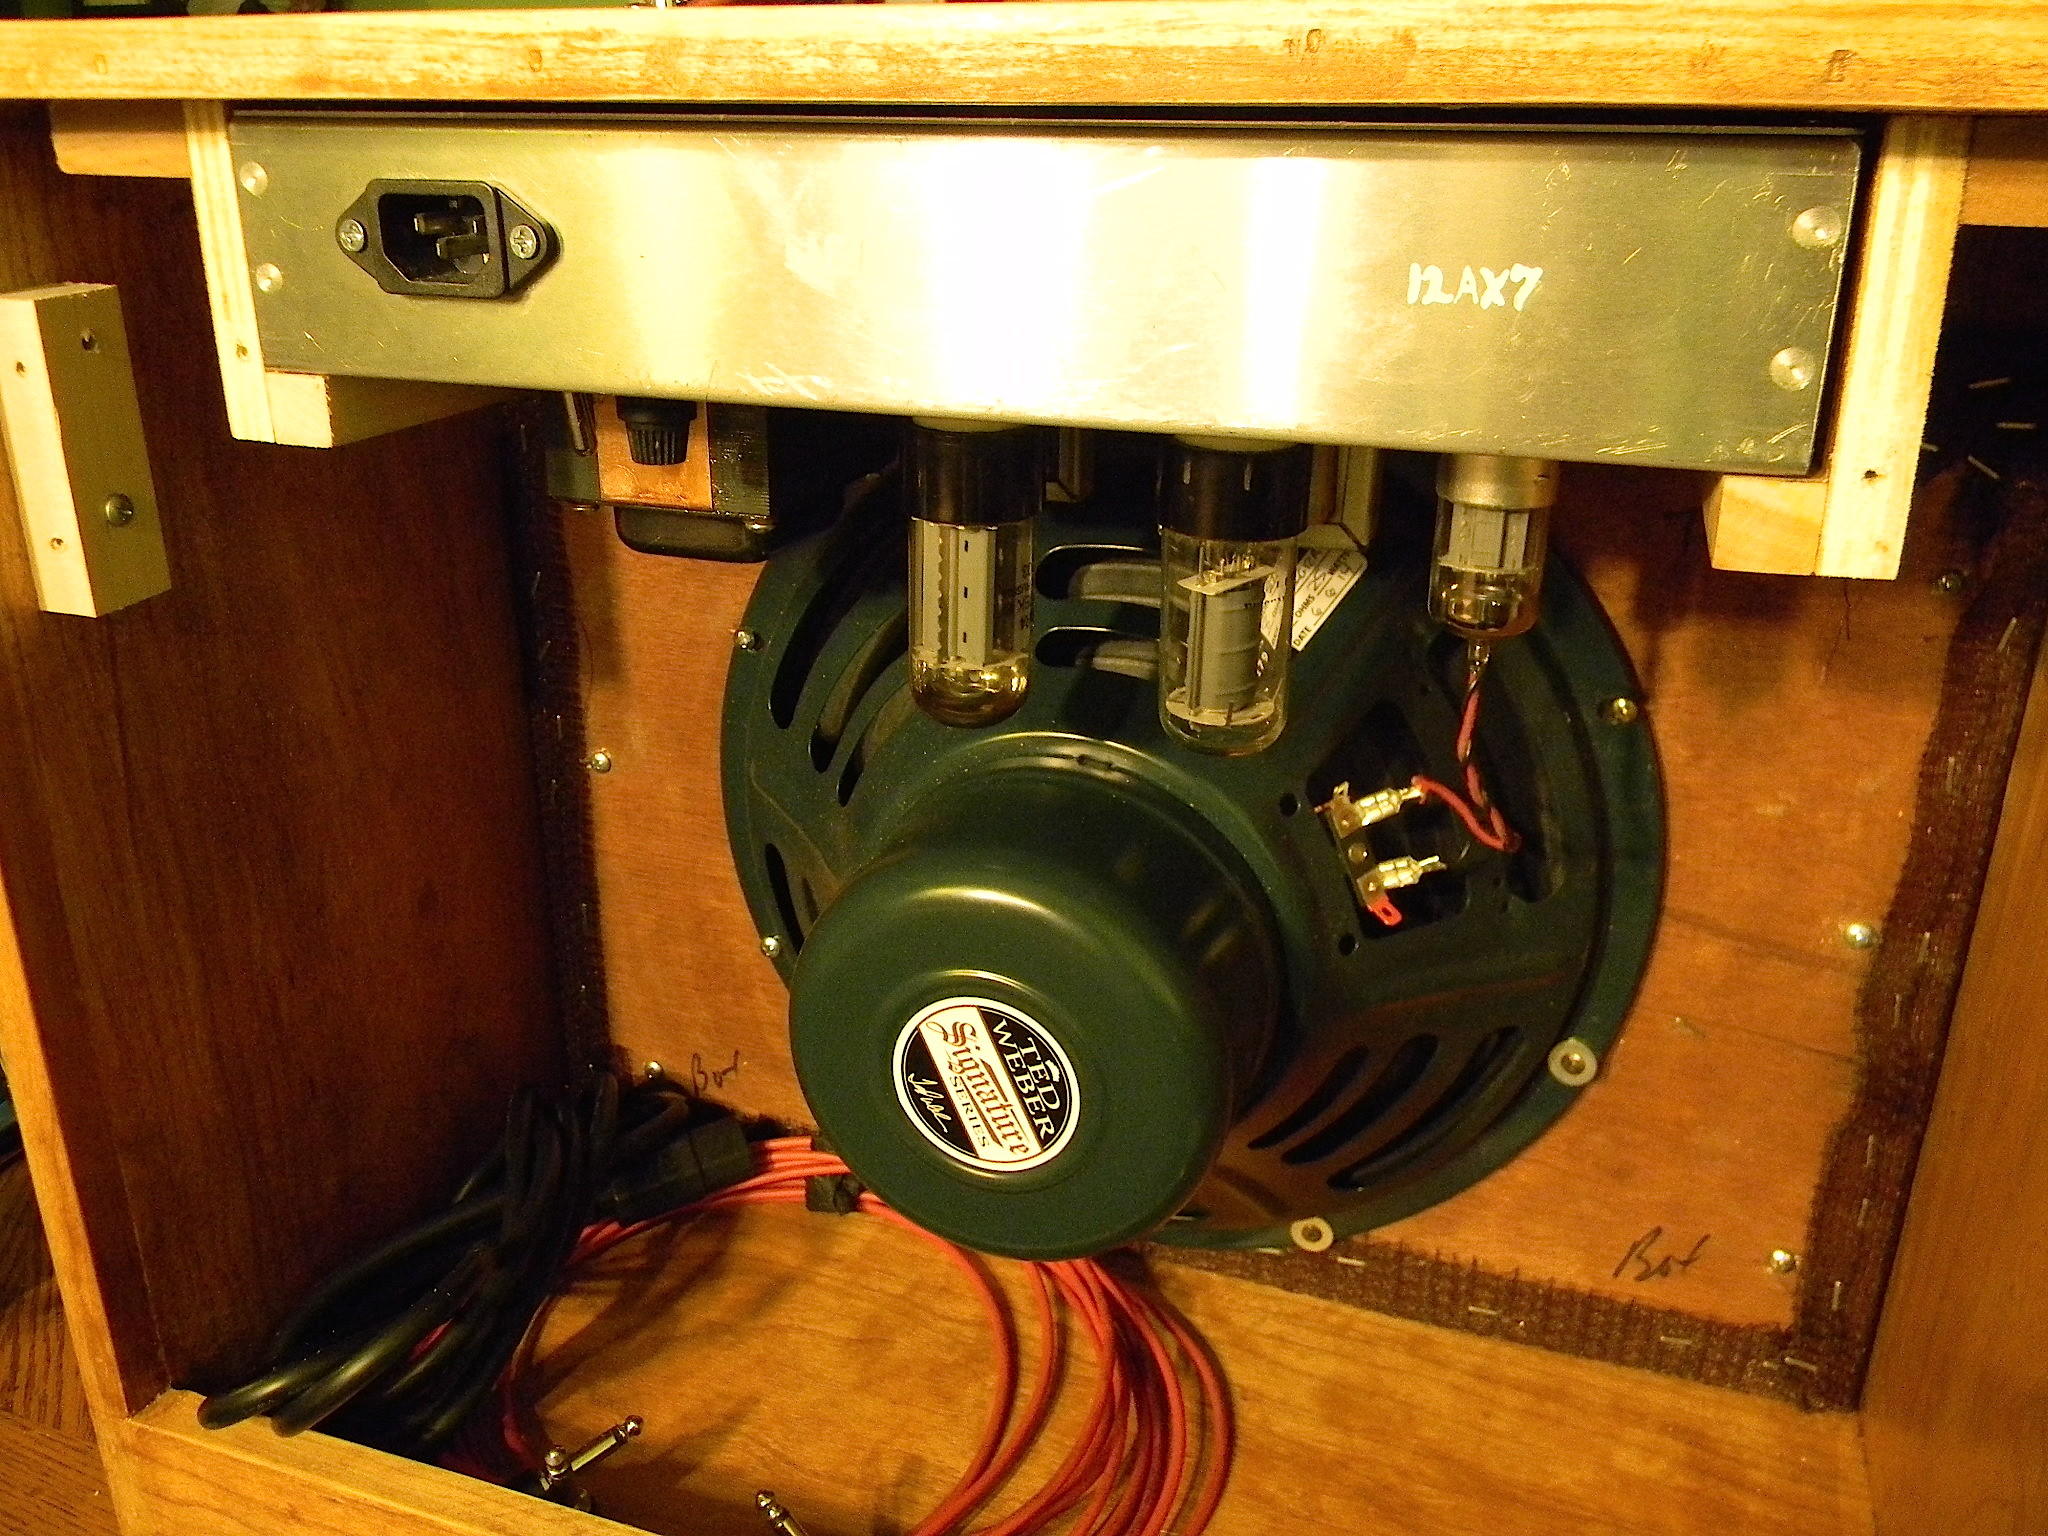
Inside the cabinet showing the tubes in and the speaker (a Weber alnico Signature 12). We came up with a nifty way to keep the chassis in there without requiring bolts through the whole cabinet, using z-brackets …

… and a piece of wood across the bottom of the back of the chassis, so simultaneously protect the tubes and hold the chassis in. You can see that I didn’t exactly coordinate with my dad on every aspect of the cabinet design … so reaching the on/off switch can be a tiny bit annoying.

Have I mentioned what awesome cabinet work my dad does? He made it out of solid cherry!

Here’s the front, taken outside under our cherry tree :). Oxblood grillcloth goes great with the cherry wood:

Close-ups of the hand-painted control panel.
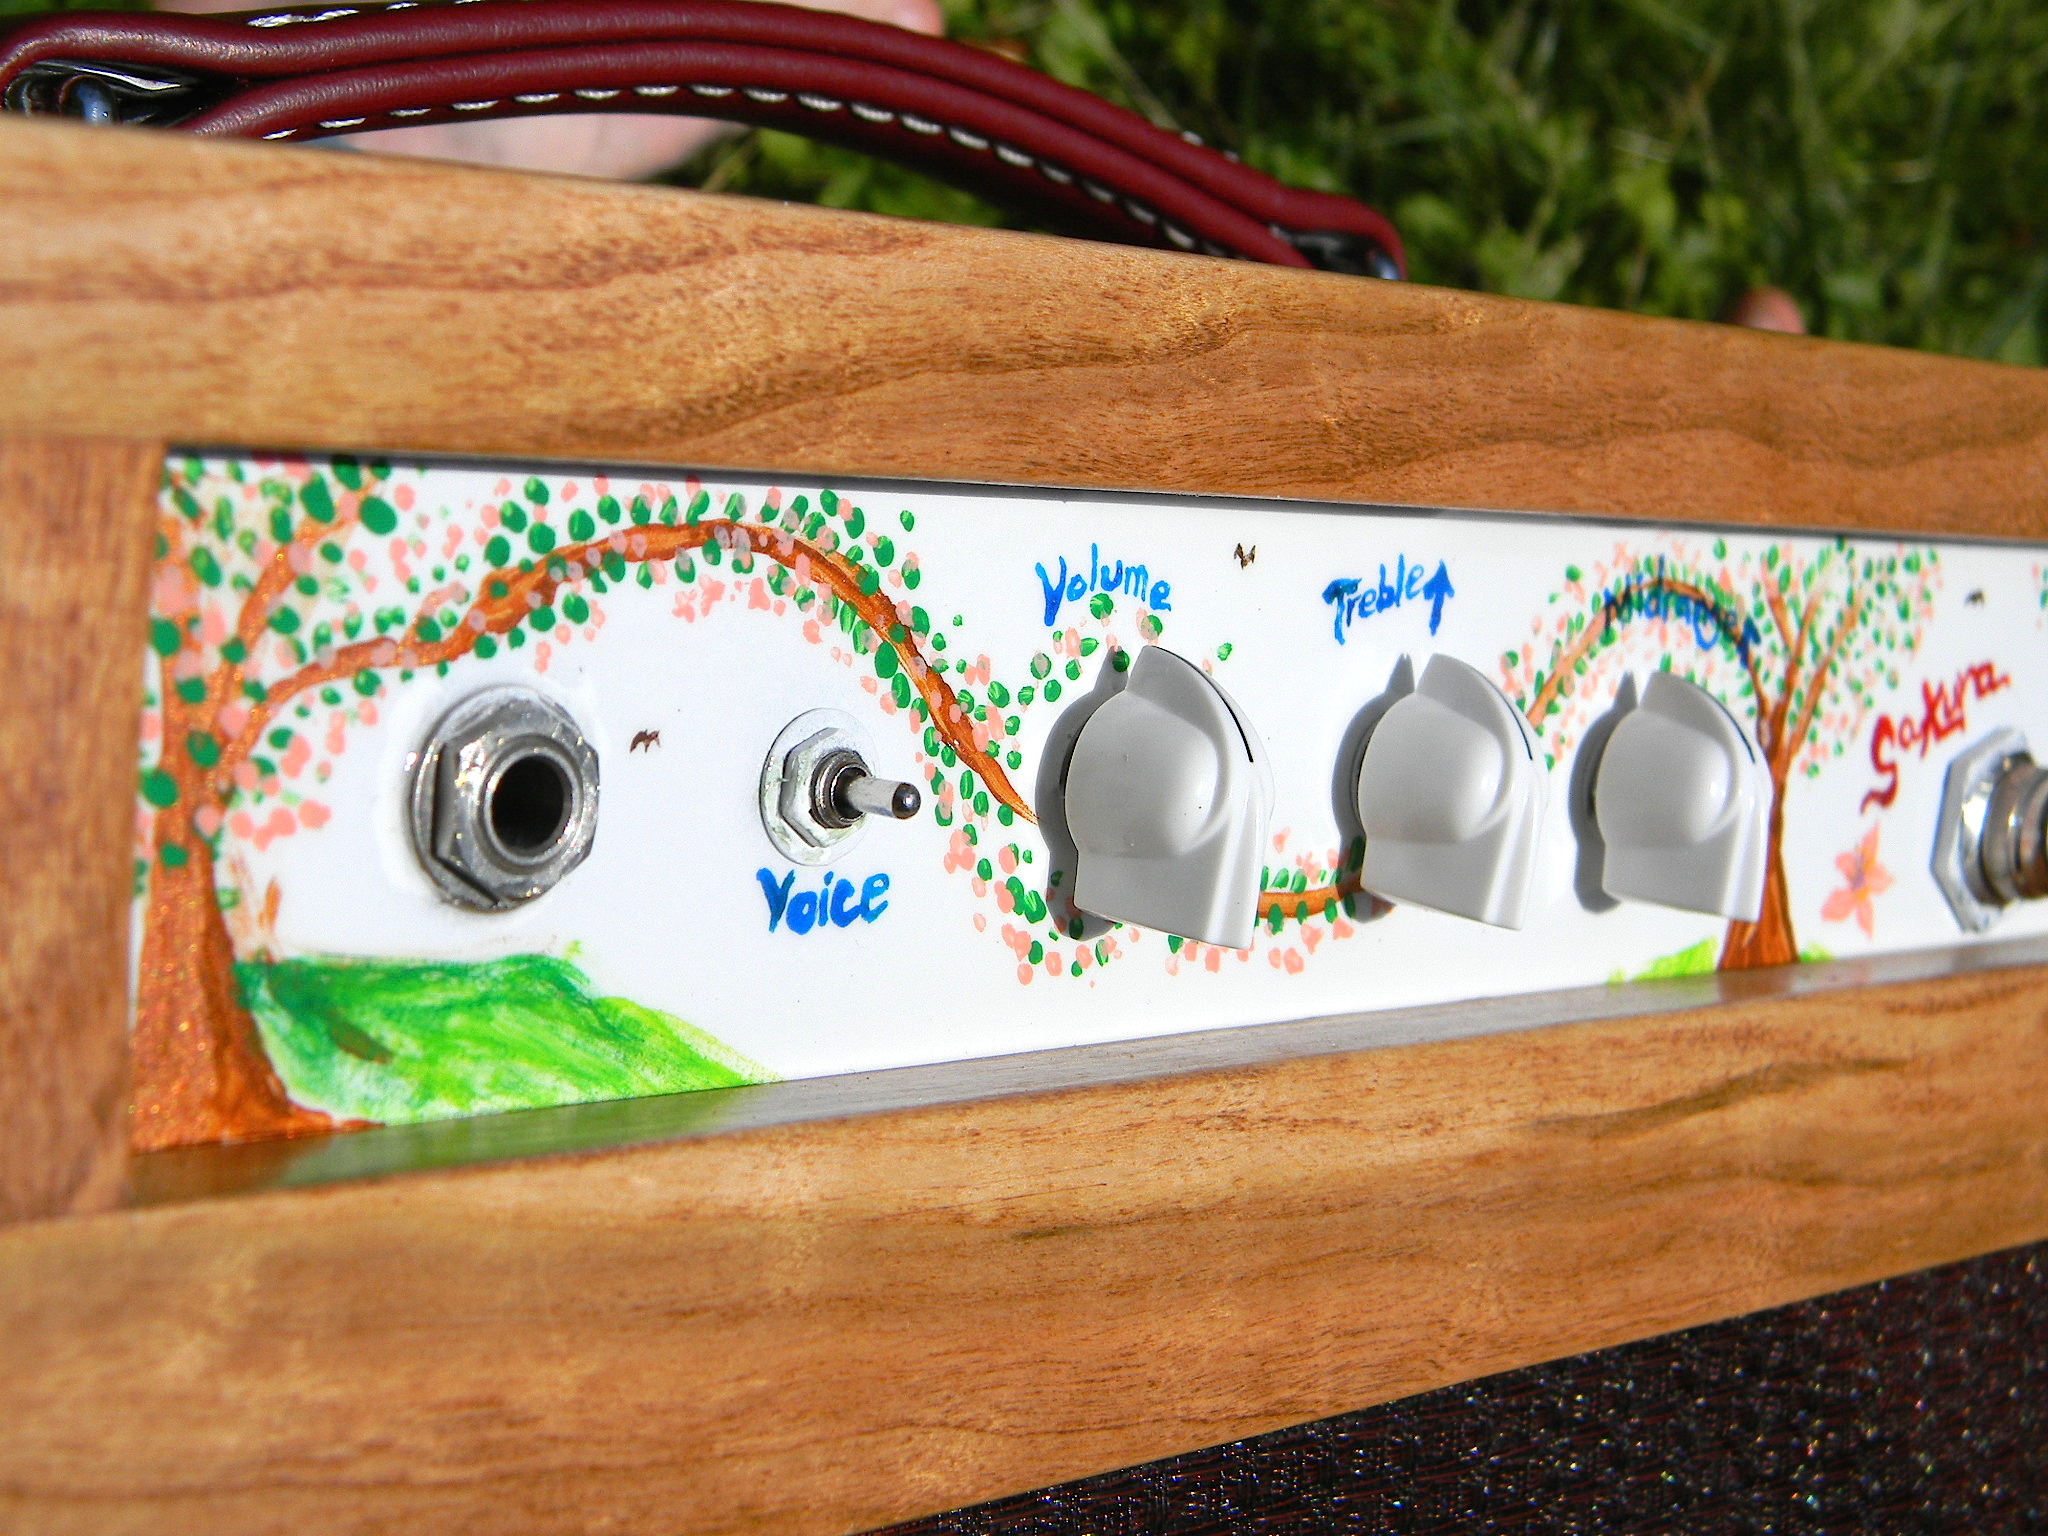
For the curious, the “midrange ^” label is easier to read in person.
It gets a little gritty but still sounds mostly clean, basically perfect for my music, and it’s not overly loud.
We’ve already taken the amp for a spin: we took it to the blues jam/open mic I go to a lot on Thursday (Bippy’s), before I had painted the faceplate, and it did a great job of hanging with a (respectful) drummer with the volume at noon despite the 5W. That 12″ speaker really helps!
The name “Sakura” is a type of Japanese cherry tree. My dad wanted me to name it Cherry, but I thought that was a little um, not my style.
Update 7/5/14:
I filmed a demo:
Updated 12/21/15: I forgot to post the schematic. I also have made a few improvements to the tone control and voice switch since filming the video. Here’s the schematic. If you’d like to hear what it sounds like now, my 2015 FAWM album uses it on nearly every track, including for bass.

Wow! That face plate paint job is superb and just what it needed to finish it off..
great sounding amp man!
Thanks, Mr. Golem!
Hey Jon,
Great work on your amp. I’m just curious which SWTC you ended up using in Sakura and what component values you settled on to achieve the rolloffs you stated in your video.
Hi, Neil, I actually ditched the SWTC after a while. I just found it to be too dark in a band mix except for blues stuff. The current version of the schematic has the updated values; the switch now uses a variant of the BMP tone control that does flat mids or a scoop at 250Hz (with negative feedback added in the second mode). The current version of the schematic is here: https://dl.dropboxusercontent.com/u/9878279/Jon%20Patton%27s%20layouts/Woodchipper/Woodchipper.png
If you’re asking how the cutoffs are calculated, it was the 38K output impedance of the tube stage + whatever the pot is set to for R and the value of the cap for C in 2pi*R*C, but I don’t even remember exactly what the original values were at this point.