I started building guitar pedals just over a year ago, and today is the one-year anniversary of the completion of my first working pedal, a tap tempo tremolo from MusicPCB. It was my fourth attempt to built a pedal, with two failed attempts at building a different tremolo and a partially failed BYOC fuzz (it worked, just not like it was supposed to).
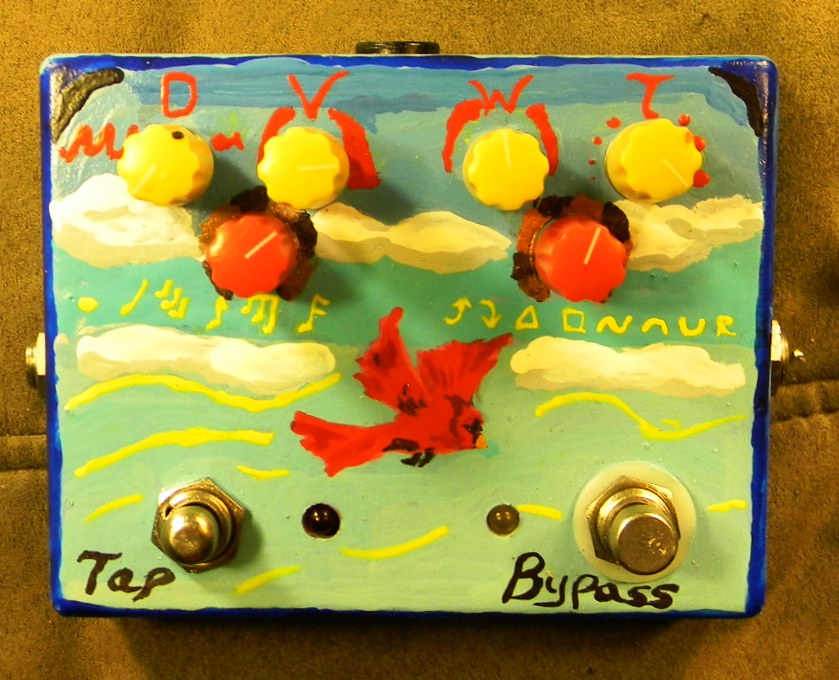
Here’s what I built, the Cardinal Tremolo:

Okay on the outside. Horrors await within. Also, the depth knob was backwards.
I colored it with sharpie paint pens. When I opened it up recently, I was pretty much horrified by the insides. I don’t even have a picture of what it looked like originally, because I was too scared to open it up once it was working. I’ll just describe what was in there: Bad soldering. The PCB was mounted in such a way that it was sitting on top of the jacks for the guitar and amp, with some electrical tape insulating it. It was lopsided and would pop up when I opened it. The LEDs were just sort of hanging around in there, with wires taped to the inside of the enclosure to hold them down. The wiring was too long in some places, too short in others, and had solder burns and its insulation was melted off in places. But the important thing at the time was that it worked and sounded good. In fact, despite the horror inside, it worked quite consistently and held up to being on my gigging pedalboard for quite some time, with one or two failures at various times.
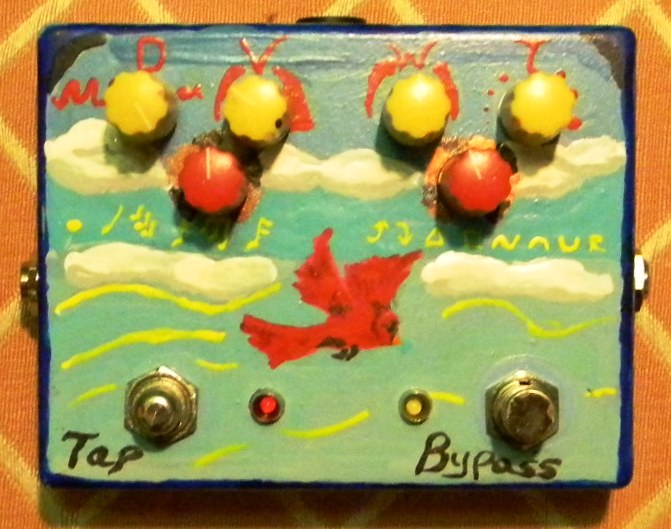
Eventually, I graduated from using paint pens and started using real paints. I built dozens of pedals, and the cardinal trem stopped looking charming and started looking kind of, well, crappy. So I repainted it in June:
Looks a lot better, doesn’t it?
Recently, the pedal had started to act funny. The tempo would change when I turned the pedal on, which was a little inconvenient to say the least. I was really scared that the pedal would have to be retired, but I was a l0t better now at fitting things into tight spots. So I pulled the PCB out of the enclosure and went to work.
Here are some things I’d learned in the meantime: How to solder properly. That having the right tools for the job is essential for a good build (good soldering iron, helping hands, etc.). How to dress wires neatly. Generally, how to build and box a circuit board so that it is a solid tool that won’t fail.
I redid all the off-board wiring. I replaced a couple dodgy looking parts. I re-positioned the switches to make a little extra room and turned the board 90 degrees so it no longer could come into contact with the jacks — now the PCB looks like the case was actually set up to accommodate it! (I was a bit lucky that it did fit sideways.) The LEDs got little metal bezels so they looked uniform and professional. I replaced all the jacks and the bypass footswitch so I could be sure that the soldering on them was solid. So here’s the inside and outside as they stand now:
Look! Bezels!

The insides previously were an indescribable horrific mess. This looks like it was made to be built this way!
A bit of irony regarding fixing this is that for the new project I designed this week I’m planning now uses the same digital chip as the Cardinal tremolo for tap tempo and everything — but I’m pairing the chip with a circuit that does both normal tremolo and the extremely-rare-but-awesome harmonic tremolo found on Fender amps from the early 1960s. Since this would retire this Cardinal, and because I arrived at the final version of the design on the anniversary of building it, I’ve decided to name the forthcoming circuit the Cardinal Tremolo. Plus it gives me an excuse to paint more birdies!
With a year of this hobby behind me, it’s amazing not only the number and variety of effects I’ve build — fuzz and distortion, boost, compression, delay, tremolo, vibrato, phase shifting, octave, envelope filter (bow chicka bow wow) — but what remains to build, things like ring modulation and more complicated or just different versions of the same effects I’ve already built. I’m incredibly proud to have six of my own designs completed in my first year at this hobby. I’m also proud to have made a dozen pedals for friends and other musicians and have them tell me that the pedals sound great (just like playing music, this is a hobby where you need feedback to know if you’re crazy). Of course, I never would have had the knowledge to do these things without the incredible support network in the DIY community. I’m consistently amazed at how generous people are with their hard-won and frequently highly technical knowledge (so I do my best to pay it forward).
And there’s always more to learn and experiment with. I’m looking forward to my second year.
Cheers,
Jon

Great post. I wish I had the same understanding and admittedly, the willingness to tackle this hobby as you have. Your work is truly an inspiration and I hope to improve my own skills to do the sorts of things you and others in the community have been doing.
Definitely looking forward to more designs (like that tremolo) from you in the future.
kwame
Thanks, Kwame. 🙂